
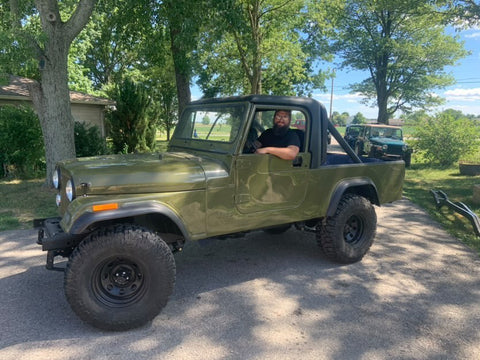
1981 Jeep Scrambler CJ8 Fully Restored
Our first complete frame off build was this 1981 Jeep Scrambler. Technically it was a 1981. In reality it was more like the Johnny Cash song. It was an 81, 82, 83, 84, 85 automobile, and we sure did have to build it one piece at a time. The customer first called and said he had been trying to get the Jeep finished for years and was running into one problem after another. He wanted the truck restored, but not necessarily exactly how the factory did everything. Some changes were cosmetic, some functional, and some were done to modernize it just a bit.
It came to us on a trailer as a pile of parts and pieces. Our customer had originally brought it to another shop to have it restored. They took it apart, cleaned the frame, and painted a new body, but couldn’t figure out how to get it all back together. A basket case for sure. Our customer dropped it off at our old shop and we got started.
It came to us on a trailer as a pile of parts and pieces. Our customer had originally brought it to another shop to have it restored. They took it apart, cleaned the frame, and painted a new body, but couldn’t figure out how to get it all back together. A basket case for sure. Our customer dropped it off at our old shop and we got started.
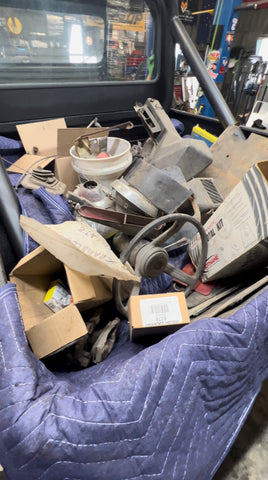
The first order of business was sorting out what was good, what was missing, and what needed refreshed. When it was dropped off our customer believed we had most everything since it had been a running and driving vehicle before it was taken apart. Unfortunately, most of the pieces were missing, incorrect parts were ordered, and a lot of it was much too crusty to put on the new body and frame. As we got started on sourcing parts we began sorting out the mechanical.
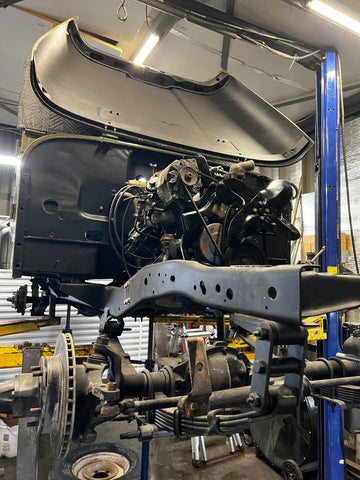
The drivetrain was refreshed first. Our customer wanted to keep the motor/transmission/transfer case/axle combination so we went through each to make sure they were in good mechanical condition. All new vacuum lines, belts, hoses, and fluids gave the old Iron Duke some pep back in its step. Fluids were drained and replaced in the rest. With the exception of the transmission which had been full of water and was initially seized all went well. The transmission was freed and we got it all back on the frame. Next, we moved on to electrical.
We chose to use a Painless Performance wiring harness which replaced every bit of wiring, every connector, and even the fuse block. All the wiring was ran and we got started on getting the needed parts to make the old gal run again for the first time in years. This is where we ran into the first of many hiccups.
Despite what every aftermarket description said tracking down the right radiator for this body and the 151 was no easy task. Finally we adapted one originally for a SBC swap and got the rest of the under hood components put together. Step next was tracking down vacuum diagrams for the motor. After sourcing every manual, factory service diagram, online resource imaginable, and posting to our followers we finally found the same setup and got things sorted and she finally started!

Starting the motor was one thing, but now we had to focus on making it run and drive. Every component of the braking, steering, and fuel systems was replaced with new. The Rochester carburetor was rebuilt and the interior was started so we could take her on the maiden voyage. We continued the search for all the missing goodies needed to make a complete truck.
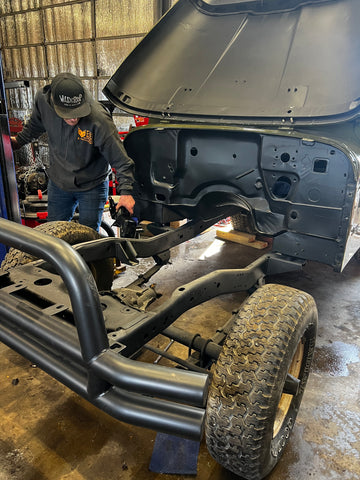
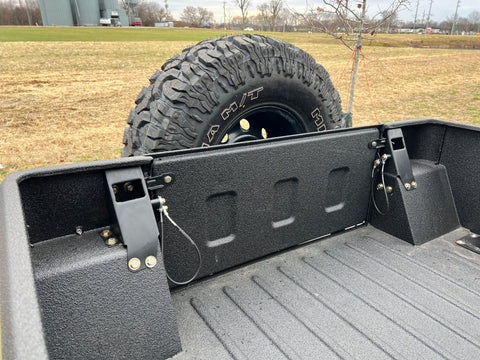
After putting some 33x12.50 mud tires on new 15 inch steel wheels we moved our focus to the suspension. That was when we hit another road block. At some point in the process before coming to us the Scrambler ended up with a later style frame and a matching driver side fender, but an early style passenger fender. This meant the shock mounts wouldn’t work and we’d have to track down the right fender. That wasn’t a big deal, but having the fender body work completed and painted to match was.
We had no way of knowing what paint was used and the body work was done in a very different way than you would expect. While we were getting that sorted she was ready to have a seat thrown in and with a bare interior she taken on a test drive!
What a great feeling that was! 5 months of hard work at that point had been completed just to go up and down the driveway at the old shop. As you can see from the picture above we still had a long was to go. The doors didn’t actually latch, most of the interior was still missing, and we were still waiting on one fender. But it ran and drove!
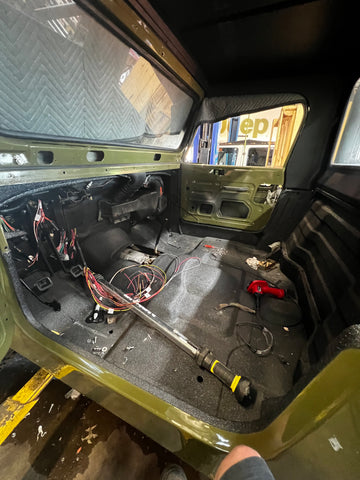
Now that we knew it would move we set our sights on the body and the interior. One big change we knew we wanted to make was to convert the doors from a fixed non-moving wing window to a moveable vent window. Since the doors were painted before they came to us we were committed to using those. We sourced new windows and hardware and made the needed modifications to the doors to allow for the moving wing windows. It was a ton of work for such a small change, but in the end really made a huge difference in comfort for an old Jeep with no AC.
Of course things couldn’t go as smoothly as just ordering the interior and slapping it in, right? Remember that new body we mentioned before? Well, none of the needed holes, mounts, or just about anything else existed in the tub, firewall, dash, or floors. What you would expect to take 5 minutes to bolt up would take an hour or two to make the mods needed for everything to bolt up. We worked through every hurdle that came up along the way, though. Including another huge one.

Never one to back down from a challenge, we moved to our new shop in the middle of the build! As we got to the home stretch we lucked into having another Scrambler in the shop at the same time. Even though the front half of the truck is very similar to a CJ7 the back is very different. There are lots of little brackets and pieces for the bed and back end that are not the same. Luckily we were able to put them side by side and make a mad dash for the finish line.
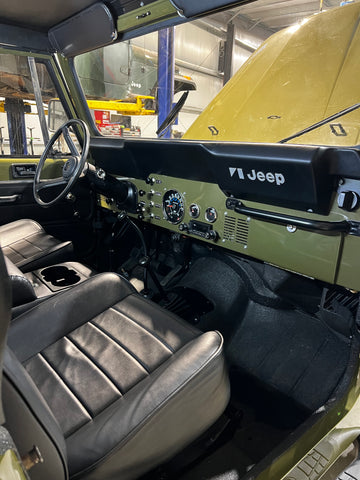
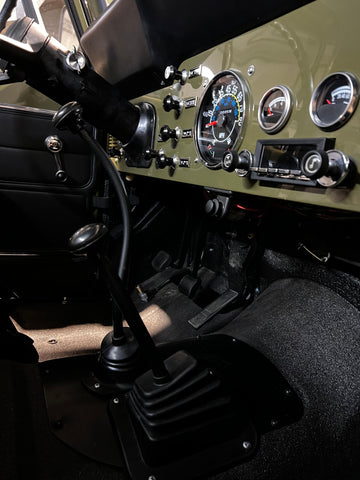
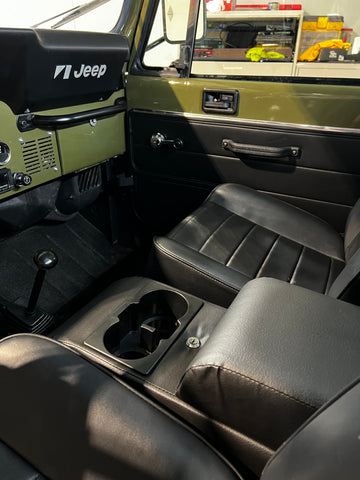
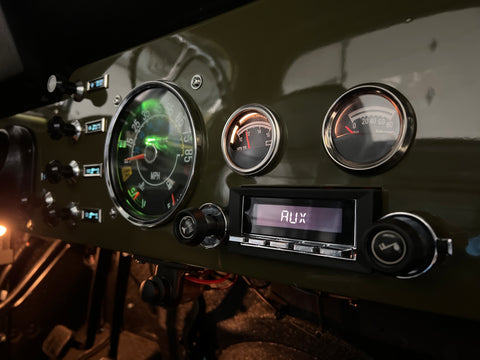
All new gauges were installed, interior lighting was added, and an all new leather interior was added. New door panels, seats, and center console bring the build to an entirely new level. A stereo was added from Retro Sound which matched the interior perfectly, but added a digital readout and an AUX input so it could be connected to the customer’s phone.
Of course we had to make sure the outside looked as good as the interior.

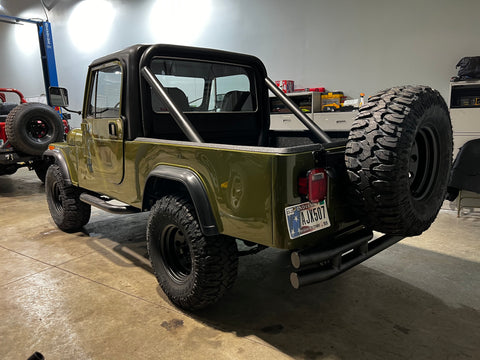
New front and rear bumpers, side steps, and the factory tire carrier were all stripped down and powder coated satin black to match the roll bar, wheels, and interior parts we had coated. A few chrome accents were chosen for the antenna, headlight bezels, and window trim to match the chrome accents on the interior and to add a little variety to the look.
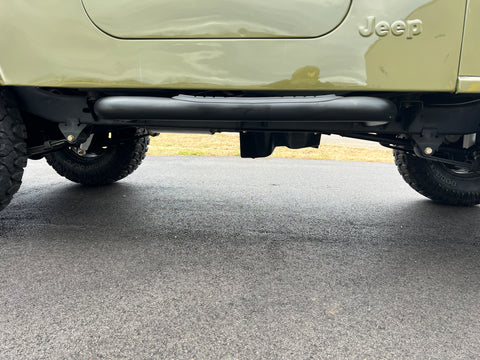
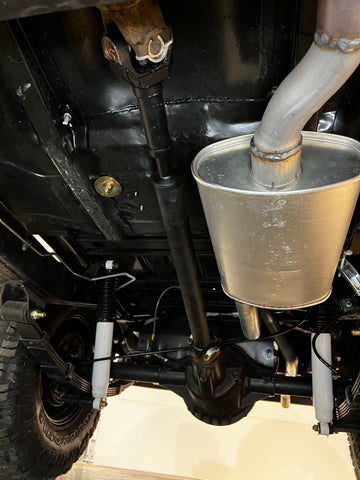
A few last finishing touches like the custom exhaust were added. Every bracket was sandblasted and powder coated, and every piece of hardware was replaced. No detail was overlooked as we began to near the end of the build.
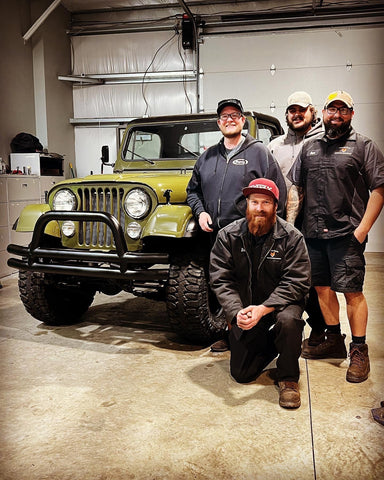
The team looked forward to this picture for 10 months. Hundreds of hours of work went into making this happen and hundreds more went into research and tracking down each piece of the puzzle to bring this vintage Jeep CJ8 Scrambler back to life.
Amazing build! I recently acquired a 1981 Jeep CJ8 with 13000 original miles on it. It has been kept in an airplane hangar; has zero rust; not dents; etc. I am wanting to do a full frame-off restoration and possibly swap out the 151 four cylinder for a 304 that I have in another 78 model CJ7, or possibly drop in a 258. If you have time, I would love to pick your brain on options. Thank you in advance for your time. My number is (512)970-7299
I would like to talk to about rebuilding cj8
Phone number please
My number 778 535 5580