
The "Bomb Shelter" Offroad Trailer Build!
We built a one of a kind, fully customized, all metal, heavy duty, fully welded offroad overlanding trailer!
This one was a unique one for us since it was a bit of a hybrid build. Many of you know Cody who helps out at the shop on Fridays and his super fancy Lexus (high maintenance Landcruiser). He and Alexa had a 2 week trip planned for a Canadian adventure and they planned to go way out in the sticks. This meant they needed a ton more room to store stuff so he commissioned us to build them a trailer!
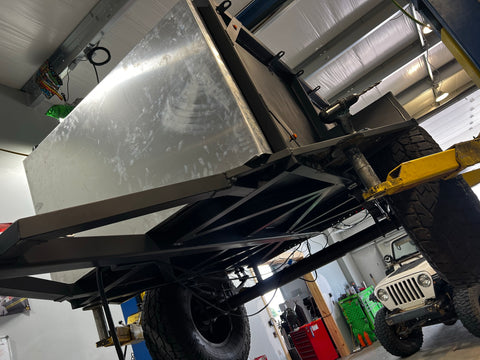
First up was laying out the general shape and size of the box and picking out the axle. 48x69x26 ended up being the perfect size. This allows the fridge inside to swing open to get items out without making it overall too big. The width was chosen for scale behing the 80 series Landcruiser that was going to be towing it.
We went back and forth on what type of axle to go with. We did a TON of research and spoke to a lot of folks who had offroad trailers to see what they loved and what didn't work well. No matter what we chose there was going to be a tradeoff. We ended up going with a traditional axle and leaf spring setup for reliability, durability, and the ability for deflection if being dragged through rocks and against trees. We knew we were going to run 35s so the trailer has higher ground clearance than the truck (since it doesn't have a center differential) so we decided making it bulletproof was better for the way this one is going to be used.
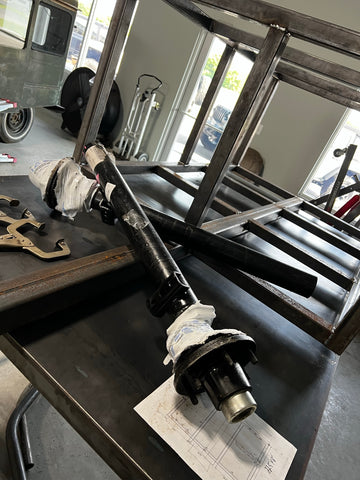
Once we picked out the type of axle we needed to track down the exact one. We REALLY wanted it to have the same 6x5.5 bolt pattern as the truck. This way spares could be shared between both without having to worry about bolt patterns. We picked up a 6,000 pound rated axle, but it was way too wide. We narrowed it and sleeved it in the middle for extra rigidity. We also relocated the spring perches to give some more flex and clearance.
After getting the basic size, shape, and axles figured out we moved on to setting the ride height. We wanted it to ride pretty close to level with the truck without having to run a huge drop hitch to get in the way. We went with the Lock N Roll articulating hitch for maximum offroad capabilities. We also wanted to be able to use the rear of the trailer as a recovery point which is why there is a heavy beam running straight through the trailer instead of a more traditional layout.
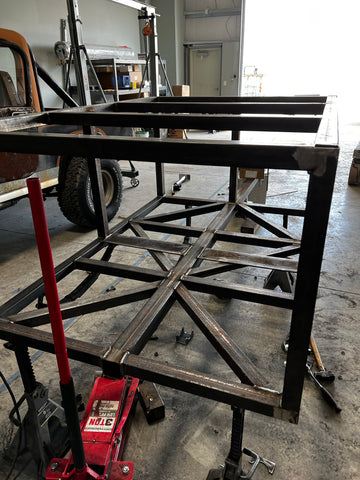
Expecting lots of abuse and side and corner hits dictated that we add a lot of triangulation to the bottom. This will allow the trailer to take a beating and keep on rolling through any adventure you can throw at it. We also chose to run the walls on the interior of the frame so that it would act as an exoskeleton and roll cage. Most trailers use aluminum panels or other lightweight materials to keep the trailer from being heavy, but the goal here was always durability so we went with fully welded 14ga steel for the walls and 11ga for the floor.
Corner gussets were added to function as a combination of reinforcements, light mounts, tailgate latch mounts, and tie down points. Additional tie own points were welded along the top to allow for more lashing options as gear is added.
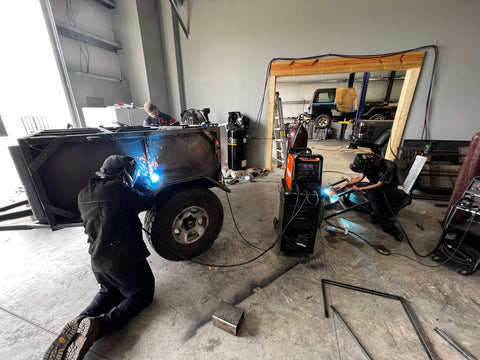
Combination fenders/fender flares/rock sliders were fabricated as well. These are solid and easily support the weight of a few guys standing on them. The allows for easier loading of the top and the future RTT. It will also support the weight of the trailer in case it is every on its side or upside down during offroad adventures.
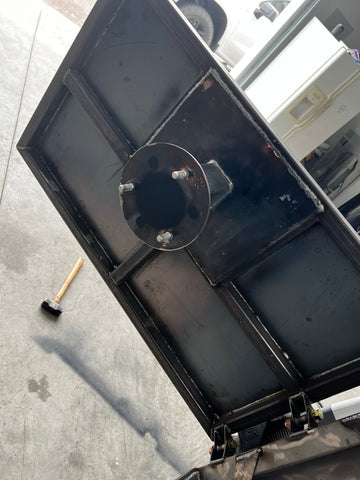
We also wanted to go with a combination rear door and spare tire mount. We mounted the tire higher up for increased departure angle and to allow access to the solid beam underneath to be used for recovery. We fabricated each piece of this as well and designed the hinges to be stout and easy to use. The door opens fully and latches against a seal for a watertight enclosure.
We also mounted a vertical water tank from Ironman 4x4 (who we are dealers for) to the tongue. We bent a piece of aluminum as well to act as a skid plate of sorts to keep rocks and road debris from damaging the front of the tank. In front of the water tank is a traditional tongue box loaded with dual batteries, a shore power charger, the ability to charge from the vehicle, and provisions for a future solar charging setup.
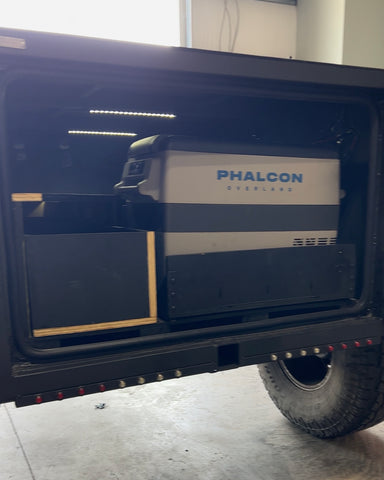
(Sorry about the terrible picture, we'll get a new one taken and uploaded soon)
For the lighting we went with LED all the way around. The running lights, turn signals, and reverse lights are all small, but bright round units. For the interior lighting we added a switch along with Firewire LED strip lights.
Cody also was able to use his drawer system and fridge mount with some modifications that was originally in the Lexus. This works well to give access to storing items the entire length of the trailer and slides to make getting to the easy. The fridge slides out as well for ease of use or can be opened exactly where it is in the picture.
Future plans also include a fold down table for the tailgate to give it an entire kitchen.
Future plans also include a fold down table for the tailgate to give it an entire kitchen.

Of course we had to add a foxhead to the outside. Here you can see it attached to Cody's truck and ready to roll on it's first torture test.
Want us to build your own dream trailer? While we are limited in the number we can build per year we are happy to build you one EXACTLY the way you want. Send us a message or an email to get in contact and let's make your dreams a reality!
Want us to build your own dream trailer? While we are limited in the number we can build per year we are happy to build you one EXACTLY the way you want. Send us a message or an email to get in contact and let's make your dreams a reality!